
This short guide shows how to quickly get consistent product images for ecommerce using Remove.bg. You will find a clear step-by-step workflow, what to check after the automatic cutout, and how to export clean files without quality loss.
Expect results in seconds for most shots, though thin straps or lace may need light edge work. The aim is a finish that looks intentional, not like a rough cutout.
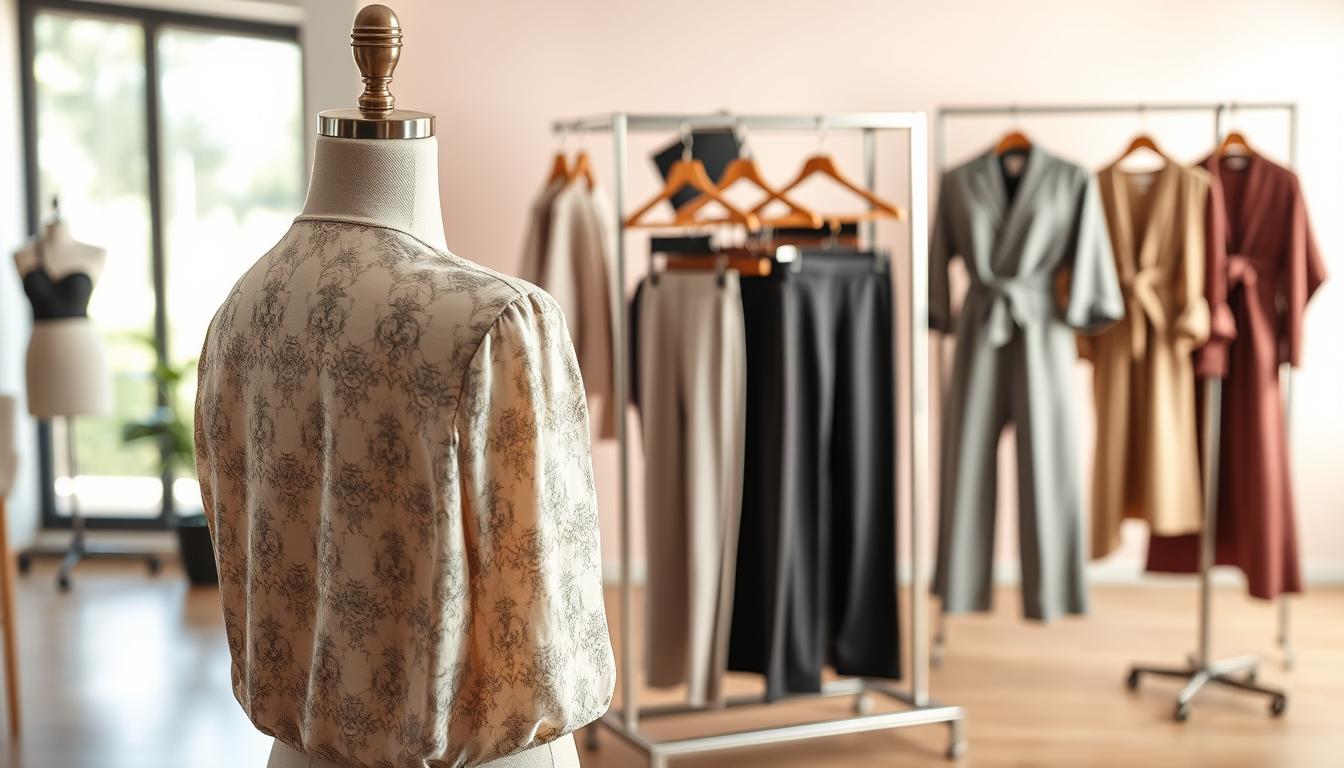
We cover the common reasons sellers edit apparel: marketplace compliance, faster catalog updates, and cleaner marketing creative.
Practical checks are our focus — edges, color match, and resolution. Later sections show extra workflow steps and alternative tools for precision or batch processing when Remove.bg needs help.
Key Takeaways
- Use Remove.bg to speed up ecommerce image prep in seconds.
- Verify edges, color, and resolution after the auto cutout.
- Expect light manual edits for fine details like straps or lace.
- Export settings matter to avoid quality loss for listings.
- Alternate tools and batch options are covered later for precision work.
Why background removal matters for clothing and product images
Consistent image backdrops make it easier for buyers to judge a product at a glance. Clear presentation reduces visual noise in thumbnails and helps shoppers scan category pages faster. That improves click-through and gives a cleaner grid on marketplaces and storefronts.
When a transparent or clean backdrop improves conversions for product photos
Transparent or neutral canvases increase trust and perceived professionalism. Shoppers compare items more easily when photos share the same framing, lighting, and backdrop. This helps listings, ads, lookbooks, and layered designs for banners and emails perform better.
Common apparel photography challenges and how they affect results
Garments with low contrast against the set, fuzzy fibers, lace, fringe, and tiny cutouts near buttons often create edge errors. Haloing or missing fabric happens when garment tones match the scene too closely.
- Why it matters: poor edges lower perceived quality and can harm conversions.
- Where transparent files shine: marketplace listings, ad creative, lookbooks, and layered designs.
- Tool limits: automatic background remover tools speed work, but quick human checks fix fine details.
Tip: Proper prep—good lighting, clear contrast, and tight framing—reduces editing time and yields more consistent results. The next section covers what to prepare before you upload.
What to prep before you upload your clothing photo
Start with the clearest, sharpest image you have to speed up editing and get cleaner results. A crisp source reduces edge artifacts and saves time during retouching.
Choose the best starting image for cleaner results in seconds
Pick shots with even lighting and minimal motion blur. Keep the item separated from the scene so edges are easy to detect.
Prioritize hems, collars, sleeves, and accessories—these small details often need care after an automatic cutout.
File types and size expectations for smoother editing
Use PNG when you need transparency, and JPEG for straightforward scenes before processing. Check resolution so you don’t waste time re-exporting low-res files for marketplaces.
Quick pre-flight checklist:
- Crop loosely—don’t cut into fabric.
- Fix obvious exposure issues.
- Ensure the item fills the frame without tight edges.
The better the source, the less manual cleanup required after you remove image background, and the faster you see high-quality results.
Step-by-step: remove clothing photo background with Remove.bg
Kick off the process by sending your highest-quality image into the tool for a fast automatic pass. This gets a first-pass cutout in seconds so you can check results right away.

Upload from desktop or drag-and-drop
Use the desktop uploader or drag-and-drop into the web app. Wait a few seconds for the automatic pass to finish.
Inspect edges and high-risk zones
Zoom in and scan sleeves, collars, hems, straps, and areas near jewelry. Look for missing fabric or soft edges.
Refine fabric details and small accessories
If the cut is too aggressive, add pixels back along the edge. If a halo appears, soften the mask and blend. Work in small edits for a natural outline.
Test against multiple backgrounds and download
Preview the result on white, light gray, and a darker canvas to reveal any fringing. Save a versioned copy before heavy edits so teams can revert quickly.
- Quick checklist: upload (desktop or drag), inspect edges, refine mask, test on several backgrounds, then download for ecommerce or design.
Export settings for clean, consistent backgrounds and high-quality results
Final file choices determine how your product listings display across stores and devices. Pick settings that match your catalog needs so you don’t redo work later.
Pick the right format for your workflow: PNG vs JPEG
PNG is best when you need transparency and crisp edges for layered design or flexible placement.
JPEG suits opaque canvases like pure white pages and yields smaller files for faster pages.
Color accuracy basics: why sRGB matters
Use sRGB for web publishing. It keeps colors predictable across browsers and devices.
CMYK can show odd shifts during editing in some apps. Convert to sRGB before final export to avoid surprises.
Resolution and sizing checks before publish
Confirm pixel dimensions meet your storefront’s zoom and crop needs. Don’t rely only on DPI labels.
Quick QA: compare exported images side-by-side to spot color shifts, soft edges, or framing issues.
| Export Option | Best Use | Color Space | Notes |
|---|---|---|---|
| PNG (transparent) | Flexible placement, layered creative | sRGB | Preserves edges; larger files |
| JPEG (opaque) | Storefront thumbnails, pure white catalogs | sRGB | Smaller files; choose quality level |
| BMP / GIF | Rare legacy use | sRGB / limited | Check compatibility before using |
Fixing common problems after you remove backgrounds
After an automatic pass, some artifacts and edge errors usually need a quick hand edit. This short toolkit helps you spot and fix the issues that most affect catalog quality.
Jagged edges, missing fabric, and haloing
Look for jagged seams, tiny gaps in fuzzy knits, and haloing that appears as a pale glow around edges.
Zoom in and use the refine or restore controls in your editing tool to paint pixels back. Soften or tighten the mask to kill halos without losing detail.
Low-contrast items and same-color problems
When a garment closely matches the scene, the automatic selection may misclassify edges.
Temporarily place the cutout over a bold color to reveal missing threads and uneven edges. Make small local fixes rather than global adjustments.
Keeping shadows and depth
Shadows add shape. Keep a subtle shadow layer or recreate a soft drop shadow so items don’t look like they float.
Consistent colors and edge quality across product pages avoid a mixed-source look and improve perceived quality and results.
Batch editing and workflow tips for product catalogs
Scaling a catalog requires rules, not ad-hoc fixes. When you work with hundreds or thousands of product images, a repeatable workflow saves time and keeps pages consistent.
When to use a desktop app or bulk processing to save time
Batch processing matters for large catalogs, frequent drops, or many colorways where manual work becomes a bottleneck. Desktop apps like Slazzer can process thousands of files via drag-and-drop and integrate with APIs for automation.
For smaller runs, cloud tools or an online app may be faster and require less setup. Choose the option that matches your volume and the time you have for setup.
Standardize cropping and background colors for uniform product images
Set defaults for crop, focal area, and canvas color. Tools such as Clipping Magic allow teams to enforce consistent sizing and color correction across catalogs.
Consistent crops and canvas tones make product grids look professional and simplify reuse in graphics and designs.
Hand-off friendly naming, storage, and versioning for teams
Use a clear naming convention: SKU_color_view_version. Keep originals, auto-cut, and final exports in separate folders for clean hand-offs.
Adopt lightweight versioning like “v1” for auto-cut, “v2” for refined edges, and “final” for published files. This helps design and ecommerce teams collaborate without confusion.
“It automated the background editing, making every photo consistent… streamlined our process… improve the speed at which products are made available online.”
- Match export settings to downstream needs for graphics and templates.
- Document the workflow so new team members follow the same steps.
- Automated edits cut time-to-live for products and reduce repetitive tasks.
Privacy, browser support, and upload limitations to know
Verify privacy terms and technical caps so your team keeps control of sensitive product imagery. Read the tool’s privacy policy before you upload, especially for unreleased images or product mockups.
Supported browsers and platforms for reliable editing
For best reliability, use the latest Chrome, Firefox, Safari, or Microsoft Edge on a modern desktop or laptop. These browsers match most editors’ testing matrices and reduce stalls during editing.
Image limits to plan around: megapixels, file size, and large uploads
Many services cap file dimensions and bytes. For example, Clipping Magic allows up to 25 megapixels and 80 MB per file. Slazzer notes uploads follow its Terms of Service and may use reCAPTCHA, which ties into Google’s privacy terms.
| Service | Max Megapixels | Max File Size | Notes |
|---|---|---|---|
| Clipping Magic | 25 MP | 80 MB | Desktop browsers recommended |
| Slazzer | Varies | Depends on plan | Uploads subject to ToS and reCAPTCHA |
| General guidance | — | Keep under 80 MB | Pre-crop or downscale to preserve key details |
- FAQ-style checklist: Which browsers work? Use latest Chrome/Firefox/Safari/Edge.
- What file size is allowed? Aim under 80 MB or follow service limits.
- What if uploads exceed limits? Pre-crop or downscale so you control which details are reduced.
Alternative background remover tools if you need more control
If a single-click tool falls short, specialized apps give you finer control over tricky edges and small details.
Clipping Magic blends AI with hands-on controls. Use the smart keep/remove brushes, hair tools, and a scalpel for precise cutouts. It supports bulk processing and configurable defaults so you can standardize crop and color across a catalog.
PhotoRoom focuses on automation and consistent outputs at scale. Teams cite faster time-to-list and reliable, repeatable results for large product feeds.
Slazzer promises fully automatic cutouts in seconds and offers a desktop app for bulk runs plus an API for pipeline integration. It’s a good fit when speed and volume matter most.
Choose by need: pick Clipping Magic for precision edits, PhotoRoom for consistent cataloging, or Slazzer for high-volume automation.
| Tool | Strength | Best for | Notes |
|---|---|---|---|
| Clipping Magic | Precision editing | Fine edges, hair, detailed trims | Bulk defaults; JPEG/PNG/BMP/GIF; sRGB; 25MP / 80MB |
| PhotoRoom | Consistent automation | Catalogs needing uniform output | Streamlined workflows; fast time-to-list |
| Slazzer | Speed and scale | Large batches, API pipelines | Automatic cutouts in seconds; desktop bulk processing |
“It automated the background editing, making every photo consistent… streamlined our process… improve the speed at which products are made available online.”
- Decision tip: Match the tool to image complexity, output quality, and your workflow constraints.
Conclusion
Start with one representative item to validate your process and catch recurring issues early.
Core workflow: prep a strong starting image, run an automatic pass to remove background, inspect edges, refine fine details, and export in the right format and color space.
Clean, consistent product images cut friction for shoppers and speed publishing for ecommerce teams. Check sleeves, collars, hems, low-contrast zones, and shadow realism before you finalize files.
Try a single hero SKU, then scale the same steps into a repeatable process for your catalog. If your current background remover lacks precision or volume, consider specialized tools built for bulk processing or advanced edge control.
Need help or custom workflow advice? Contact our team to discuss options and next steps.