This short guide shows how to get clean, consistent product shots using a modern phone and simple tools. It covers the full workflow: gear and prep, DIY setup, lighting and color, camera settings, shooting styles, and basic editing. The goal is repeatable, catalog-ready images that reduce returns and build trust.
Modern mid-level models like iPhone 8 or newer, Pixel 2 or newer, and many recent Samsungs capture sharp photos suitable for listings and social media. Free AI retouching helps with quick cleanup, background removal, and batch consistency, while good shooting technique gives true color and fit cues.
This blog-style guide stays practical and current. It targets resellers, small brands, and anyone who needs product photography without a studio. Read on for a step-by-step approach that keeps results consistent across your store.
Key Takeaways
- Follow a repeatable setup to ensure consistent framing and lighting.
- Use mid-range phones; modern models can produce sharp catalog photos.
- Free AI retouching speeds cleanup and enforces batch consistency.
- Good shooting technique still matters for color accuracy and fit cues.
- Work through gear → setup → lighting → settings → shoot → edit.
- Ideal for resellers, small labels, and quick catalog needs.
What You Need to Photograph Clothes with Phone
Good product photos begin with simple, reliable tools you can use every day.
Camera baseline: Aim for a 12MP+ sensor (iPhone 8+, Pixel 2+, Galaxy S8+, P20 Pro+). Modern mid-level models capture enough detail when exposure and stabilization are controlled.
Stabilization: Use a tripod or clamp to lock angle and framing. A mini tripod works for flat lays and accessories; a full-size tripod is best for on-model or hanging shots.
- Wireless remote (e.g., CamKix) prevents tiny shakes from screen taps.
- Add-on lenses: wide for larger items, macro for texture; avoid fisheye distortion.
- Camera apps (Camera+ 2, ProCamera, Lightroom, Camera FV-5) let you set white balance and exposure.
- RAW gives more edit latitude; JPEG is efficient for web-first workflows.
| Item | Example | Why it helps |
|---|---|---|
| Smartphone | iPhone 8+, Pixel 2+ | Sharp sensor, good dynamic range |
| Tripod/Clamp | Manfrotto PIXI + clamp | Consistent framing for catalog shots |
| Remote | CamKix Bluetooth | Eliminates shutter shake |
| Add-on Lens | AMIR 3‑in‑1 | Macro texture shots without distortion |
Bottom line: Prioritize a stable setup and controlled light. Even modest equipment performs well when you lock framing and expose correctly.
Prep Clothing Items So They Look Camera-Ready
Start clean and simple. Wash or spot-clean each piece, remove lint and hair, then steam or iron to remove wrinkles. Small effort here saves editing time later and keeps product photos honest.
Check seams, buttons, and zippers. Trim loose threads, replace missing buttons, close zippers, and tuck or remove tags so nothing distracts in close-ups.
Fast camera-ready checklist
- Clean the clothing and remove lint.
- Steam or iron to smooth wrinkles.
- Fix loose threads and secure buttons.
- Close zippers and hide or remove tags.
Shape each piece so it looks full and true-to-fit. Align hems, smooth sleeves, and square shoulders. Use tissue or cloth to stuff hats and bags so they hold form.
Use pins or clips just out of frame to pull fabric into place. This small shaping step helps the camera record real texture and color without false shadows.
| Task | Why it matters | Quick tip |
|---|---|---|
| Lint & hair removal | Prevents false speckling in close-ups | Use a lint roller or tape |
| Steam/iron | Makes fabric read as higher quality | Work inside-out for delicate pieces |
| Shape & stuff | Keeps items from looking flat | Use tissue for hats, cloth for bags |
Last look: before each shot, make sure the product is centered and presentable. This routine speeds the shoot and improves conversion by keeping every product consistent on the page.
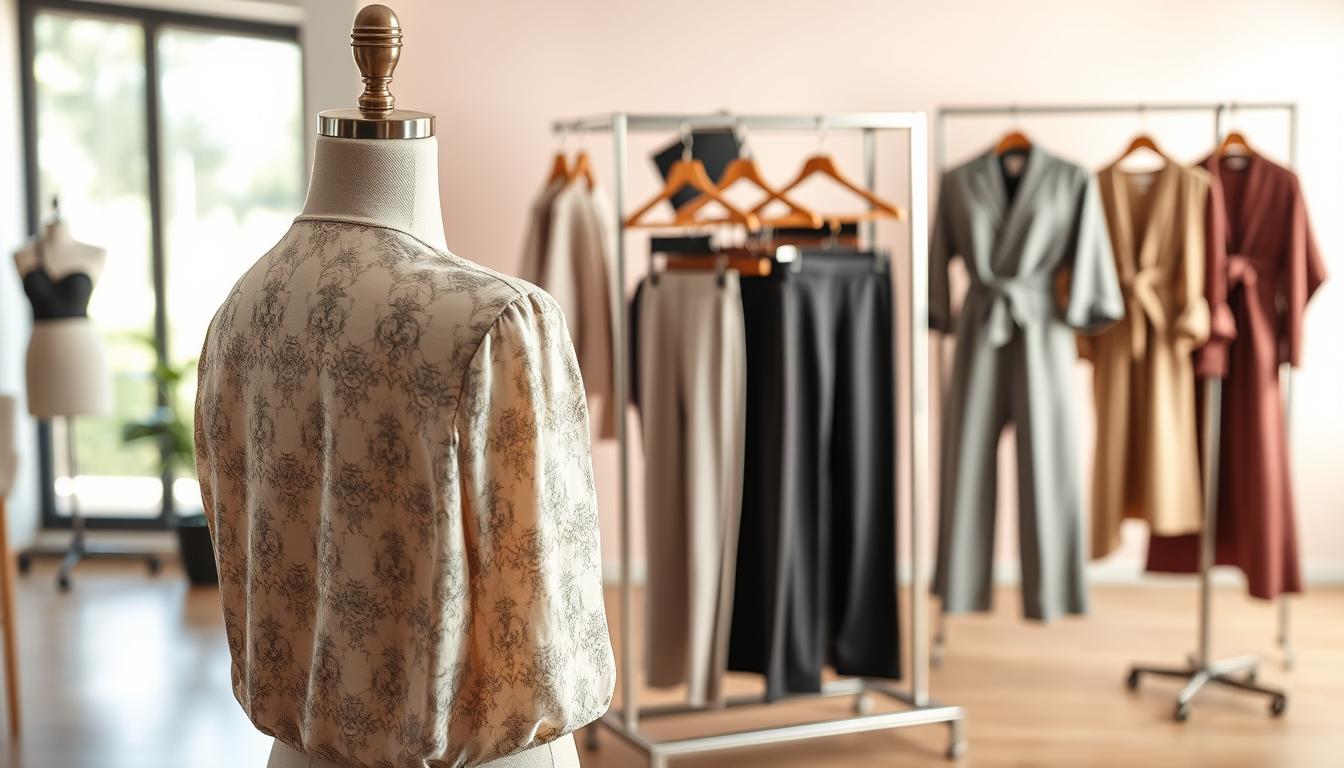
Build a Simple DIY Setup: Background, Surface, and Light
A repeatable, compact studio needs only a surface, a plain backdrop, and a single light source. This simple step sets the foundation for clean product images that sell.
Choose the right surface
Pick a flat area sized for your styling method. Use the floor for flat lays, a table for small items, or push a table/chair to a wall to hang a sweep.
How a sweep works
A sweep is a continuous white or neutral background that curves from vertical to horizontal. It removes the harsh horizon line and makes product photos look professional.
Materials and lighting choices
Use white seamless paper, craft paper, or a neutral cloth that fills the frame. Bright, indirect window light is free and flattering. For repeatability, use softboxes or a light tent.
Diffusion and fill
Soften harsh light with a sheer curtain or diffusion panel so texture shows without deep shadows. Place a white foam board opposite the main light as a bounce card to lift shadows and keep color true.
Fast workflow: set the background first, position the product, mount the camera on a tripod, then tweak light and fill. Keeping each element in the same place lets you swap items quickly and keeps images consistent.
| Element | DIY option | Benefit |
|---|---|---|
| Surface | Floor, table, chair | Matches styling method (flat lay or hanging) |
| Background | Seamless paper, craft paper, neutral cloth | Clean sweep, fewer edits |
| Light | Window light, softbox, light tent | True color and repeatable lighting |
| Fill | White foam board | Reduces shadows, preserves detail |
Lighting and Color That Make Clothes Look True to Life
Good lighting is the single biggest factor that makes fabric read as high quality online. It controls perceived texture, true color, and how the product looks on a customer’s screen.
Best times and placement for natural light
Shoot near a large window in bright, indirect natural light. Avoid direct sun; it creates harsh highlights and deep shadows.
Rotate the setup until highlights and shadows are even. Pick the same time of day for repeat shoots to keep color consistent.
Indoor tools for consistent results
Softboxes and light tents give repeatable product lighting for eCommerce. Ring lights work for detail shots but use a diffuser to stop glare.
Handling reflective fabrics and bright whites
For satin or coated materials, add more diffusion and move lights farther away to reduce specular hotspots.
For bright whites, expose for the garment, not the background. Use a slightly darker backdrop to show edges clearly.
“Accurate lighting reduces returns and builds customer trust by matching what people see on screen to what they receive.”
| Problem | Quick fix | Why it helps |
|---|---|---|
| Harsh shadows | Add diffusion or bounce card | Softens contrast, shows texture |
| Color cast | Use consistent white balance | Keeps whites neutral and product color true |
| Hotspots on shiny fabric | Increase distance or angle lights | Prevents blown highlights that hide detail |
| White edge loss | Use darker sweep or adjust exposure | Makes edges visible and accurate |
- Take a test photo before a batch. Check that whites are neutral and blacks show detail.
- Fix any color casts or glare before shooting the full set.
Phone Camera Settings That Improve Clothing Photos
Fine-tuning your camera settings makes every product shot sharper and more consistent. Start with a clean lens and set your camera app to the highest quality option available (RAW if you plan to edit, JPEG for speed).
Alignment and framing
Turn on the grid and level to keep hems straight and collars centered. This simple step improves cropping consistency across product images and speeds batch editing.
Focus and exposure
Tap to focus on the garment and lock focus. Then lock or gently lower exposure so fabric detail is visible and the product isn’t underexposed.
White balance
Set white balance to match your light source. Auto white balance (AWB) can work when you use a neutral sweep, but a manual preset keeps color steady across a whole set.
ISO and shutter speed
Keep ISO low (under ~800) to avoid grain. Use a shutter speed at or faster than 1/125 sec if you’re handheld. If you use a tripod, you can safely slow shutter speeds.
Stabilization and test
- Use a tripod and a Bluetooth remote or the timer to prevent shake.
- Remove shiny cases to reduce flare and clean the lens before each session.
- Take one test photo, zoom in on stitching, and confirm sharpness before the full batch.
What to avoid
Avoid digital zoom, on-camera flash, and heavy filters. They reduce detail, create hotspots, and change true-to-life texture and color.
| Setting | Quick guideline | Why |
|---|---|---|
| ISO | Keep ≤800 | Less grain in images |
| Shutter | ≥1/125 handheld | Prevents motion blur |
| File | RAW or high-quality JPEG | More edit flexibility or faster workflow |
Ways to Shoot Clothes: Flat Lay, Hanger, On-Model, and Lifestyle
Pick a shooting style that matches the channel: clear catalog shots sell, while lifestyle images build brand mood for social media.

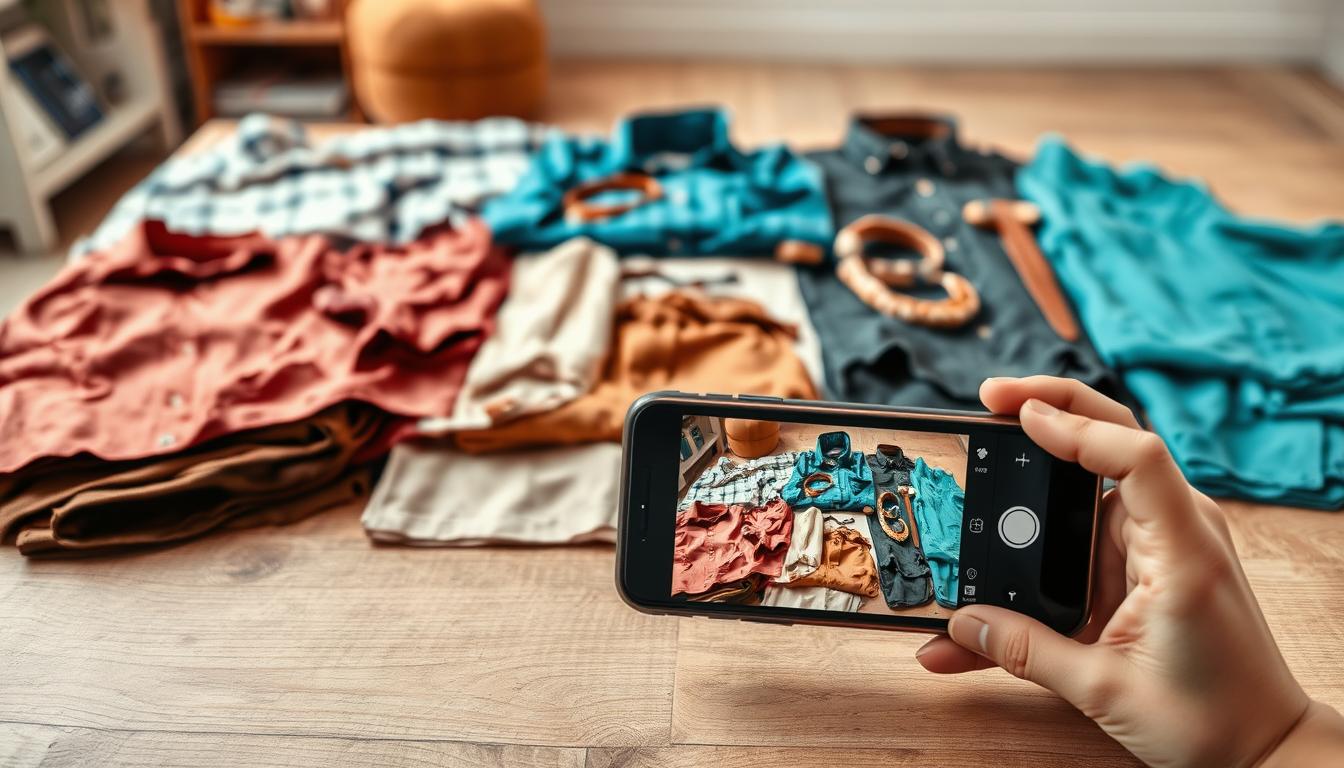
Flat lay for clean catalog results
Flat lay works great for product pages. Smooth the fabric, shoot overhead, and use minimal props so the product stays the focus.
Do one item per photo on a plain surface so listings stay consistent and easy to crop.
Hanger shots for fast background removal
Hang garments against a plain wall to simplify background removal. White walls are ideal for AI tools.
Practical rule: if the piece is white or cream, pick a slightly darker neutral so edges remain visible.
On-model images to show fit
Use models to show drape, movement, and sizing. Capture front, side, and back to reduce buyer uncertainty.
Keep poses simple and uncluttered so customers focus on fit and fabric.
Lifestyle shots for brand storytelling
Build a small scene that matches your brand—location, props, and activity—but keep the product readable.
Mix shot types: lead listings with a clean product view, then include on-model and detail shots to boost customer confidence.
- Batch by method—do all hanger shots, then flat lays—to keep lighting consistent and speed production.
Composition Tips: Make Sure the Clothing Is the Star
Simple composition keeps shoppers focused on the product, not the scene. Use one clear subject per frame so listings are obvious and buyers don’t need to guess what is for sale.
One item per photo reduces confusion and speeds editing. A single item makes AI background removal and bulk color correction much faster.
Fill the frame enough to show texture and seams, but leave breathing room. Consistent margins around the product make pictures look balanced and premium.
Standardize a house style
Fix distance, angle, and crop for every shoot. Use the grid to center necklines or waistbands and keep horizontals straight. Mark tripod and product placement on the floor so images match across days.
- Follow a short checklist for each item: front, back, and one detail shot.
- Avoid busy props or clutter that distracts from the clothing.
- Consistent framing helps batch presets and speeds bulk edits.
| Alignment task | Quick tip | Benefit |
|---|---|---|
| Centering | Use grid lines | Uniform product images |
| Leveling | Keep horizon straight | Cleaner cropping |
| Placement | Use floor marks | Repeatable shots |
Capture the Product Details Customers Want to See
Close, clear images sell more—so plan shots that prove quality and condition. A minimal, consistent set of views answers most buyer questions and speeds editing.
Must-have angles
Minimum image set: front, back, inside (lining or labels), and tight close-ups of key features. These shots form the backbone of any product page and give customers confidence.
Detail priorities
| Priority | Why it matters | Example |
|---|---|---|
| Fabric texture | Shows quality on screen | Macro or tight framing |
| Stitching & hems | Indicates durability | Close-up of seams |
| Closures | Shows function and finish | Zippers, buttons |
| Labels & wear | Transparency for resale | Tag, any defects |
How to capture texture accurately
Move the camera closer instead of using digital zoom. If you use a macro lens, test it to avoid distortion.
Keep perspective and lighting consistent
Lock the tripod height and distance. Move only the product between shots so customers can compare different products without changing scale.
- Shoot in this order each item: front → back → inside → two close-ups (fabric, closure).
- Keep lights and bounce cards in place; shift the product to tame shadows.
- Quickly zoom in on the camera screen to confirm stitching is sharp before you move on.
Why close-ups matter: shoppers can’t touch items on a screen, so tight images act as a tactile proxy. Clear detail shots reduce uncertainty and lower return rates.
Editing, Background Removal, and Free AI Retouching
A small, consistent editing routine saves time and keeps your listings accurate. Start each batch by straightening and cropping so framing stays uniform across a product line.
Fast mobile edits: in apps like Lightroom or Snapseed, set white balance, then tweak brightness and contrast. Recover highlights and shadows, add modest sharpness, and avoid heavy filters. These steps make fabric texture readable without altering the true color.
Color and consistency
Set white balance so whites look neutral, then increase saturation very slightly if needed. Save a preset and apply it across the set. Always compare edited images side-by-side to catch color drift between shoots.
Background removal and white background
Use background removal when you need a clean, uniform white background for catalog listings or social media. AI tools handle most items quickly, but check edges on sheer fabrics, lace, and reflective surfaces.
When to use AI or outsource
Free AI retouching is a fast option for small fixes, batch background removal, and spot cleanup. Outsource bulk volumes or tricky items (white-on-white, heavy reflections) to save time and get consistent results.
| Task | Quick tool | When to outsource |
|---|---|---|
| Basic edits (exposure, WB) | Lightroom Mobile | No |
| Background removal | Botika, Snapseed mask | Large batches or hair/fine edges |
| Complex retouching | Free AI or Pixelz trial | Reflective fabrics, bulk jobs |
Conclusion
A simple, consistent process beats expensive gear for reliable product results.
This guide shows a repeatable way to take pictures that sell: prep items, use a neutral sweep and soft light, lock camera settings, and shoot consistent angles before editing.
Focus on three things that matter most: soft diffused lighting, a stable support for your camera, and accurate color. These improve imagery more than costly accessories.
Standardize one item per photo, keep framing steady, and save edits as presets so your brand looks uniform across listings. Include clean product views, tight detail shots, and optional on-model scenes for fit.
Finally, batch shoots, use AI background removal when it speeds work, and follow this quick action plan: pick a bright spot, set a neutral sweep, mount the camera, shoot a test image, then photograph the full set and edit consistently.